Advanced Migration GBB
We often need to try things ourselves. While vendors can provide a test environment or POC gear, it can be faster to make your own setup and bang against it. Working with an OEM or Solution Provider can sometimes be slow, require a business justification that might not be immediately forthcoming or budget, especially in this day and age, that is non-existent. But you’ve got gear and your crafty. 🙂
Please read this in its entirety before taking any action. My stream of consciousness writing style isn’t for the faint of heart.
Microsoft provides a bunch of ways to try Azure Stack HCI. The most readily available is HCIBox directly linked in the portal to get you a fully up and running environment with very minimal work. The challenge though is it runs on Azure and Azure running a big VM isn’t exactly cheap. Especially if you’re using US East/West 24/7. So, with these things in mind, I thought I’d work on a set of blog posts that will help you take gear you might already have and run a test/demo cluster to try out a bunch of interesting and exciting things Microsoft has been working on lately. Please consider this a loose guide vs a strict to-do list. Your mileage may vary, and I’ll provide a bit of my own experiences and tips along the way. I’ll try to clear the path as much as I can to make it a straightforward exercise. Yes, this is what it looks like when a Microsoft employee goes rouge-ish. There are very good reasons you shouldn’t do what I’m about to explain. Case in point:
*** General Disclaimer***
You know this isn’t going to be supported right? Like, you’re using old potentially out of warranty gear in the hopes to emulate a supported and new solution. Yeah, well just to make sure it’s said, You’re on your own. Don’t go complaining to the OEM or Microsoft should the server(s) burst into flames and burn down your House or Datacenter. We warned you. If you turn in a support request in the Azure portal, you will be, politely, told to pound sand.
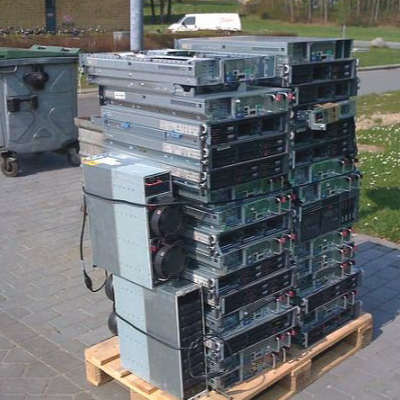
So, you’ve got some obsolete off lease/decomm’ed gear laying around and you want to give Azure Stack HCI a try. Awesome! Maybe it’s some old Haswell or Broadwell spec gear. Maybe it’s a newer workstation, or a KabyLake Intel NUC. Most anything will do in this type of scenario. It’s just Windows after all. One thing of note though is that Azure Stack HCI 23H2 isn’t strictly Windows. Azure Stack HCI comes out of the Azure Windows development branch and as such it’s HCL IS slightly different. It’s one of the many reasons Microsoft works with our OEMs to publish Validated Nodes, Integrated Systems, and Premium Solutions.
You can find out more about those here: Azure Stack HCI Solutions | Microsoft
Review the document here for system configuration ideas: System requirements for Azure Stack HCI, version 23H2 – Azure Stack HCI | Microsoft Learn It’s your guide to the floor from a config perspective. Bad things will happen when you go below/outside of this.
Pay particular attention to the Storage, Networking and CPU requirements. Also ensure that you have a TPM (2.0) and can use Secure Boot. You can run all of this on a single node, but the more you put on one system the slower it will run. Have a look at the HCIBox requirements for an idea of the resources needed. If it’s Single Node, you should use an all NVME/FLASH storage environment. If you do 2+ nodes, 10Gb RDMA networking is needed between the nodes for Storage Spaces Direct minimum. If you have more than one node. They all need to match from a hardware config perspective.
Another special note: Don’t leave Fiber Channel cards in the server. It’s bad. HCI is a Hyper Converged Infrastructure solution. It doesn’t use them and doesn’t support them. One of the other ways it differs from Windows Server, no SAN disks! And since I mentioned disks, have some. OS Disk (No USB Keys/SD Cards or trying to run Azure Stack HCI on WindowsToGo), and Data Disks. Also ensure that your storage controller isn’t hiding your disks. It needs to be set to “IT” mode. Get IT?? 😀
So, if it isn’t strictly Windows what does that mean? Well, for starters you might have problems booting the ISO Image. I have colleagues who’ve tried to set this up at home and they end up with BSOD because things that worked in Azure Stack HCI 22H2 aren’t working in 23H2. A lot was done in the branch to pare down older system support including removing inbox chipset and storage drivers that have been there since the beginning of time.
What can I do about that, you say? Well, I’ll tell you how I get around these types of issues. I install Windows! At least, to begin with. The current Windows Server 2022 release is always a good base to begin with to get up and running and chasing down driver support: drive controllers, nics, OOB Controllers, etc.
Go here: Windows Server 2022 | Microsoft Evaluation Center get the ISO, or download the latest Non-LTSC release from MSDN, and use Rufus or another method: Create an USB Drive for Windows Server 2022 Installation – Thomas Maurer to create a bootable USB drive. Install this first on the system.
I know what you’re thinking. “I’ve come here to learn how to setup Azure Stack HCI and this numskull is sending me on a wild goose chase!” Well, yes of sorts. (I prefer snipe hunts myself.) Installing the latest version of Windows does a couple of things for us.
- It gives us a known good OS (with a GUI!) that should work and validates the hardware is stable and able to run something “quirkier”.
- It allows us to gather and validate all the firmware and drivers we need to move the hardware to a good current config.
A lot of times, when dealing with decomm’ed or older hardware it may not have been current when it was powered off or at least now that you’re powering it back on. We need to check it. The best way to check it is to start clean. Get rid of Linux, ESXi, or older versions of Windows and see what needs to be remediated. An hour on the front end of this adventure will save many more troubleshooting issues trying to get things running later. If the system has an out of band system controller like an iLo, DRAC, XClarity, etc… those often keep system component and firmware information you can reference to start.
After installing Windows Server 2022 (GUI!) onto the system, boot into Windows and do the usual things. Give it a Password, set an IP that can access the Internet, and take inventory of the Device Manager driver situation on the machine. Go to the Manufacturers website under the support section, and search for relevant drivers for the last version of Windows supported on the hardware. Whether that’s WS2016, Windows 10 etc.. the newer the better. That’s a good driver baseline and a check against the age of the machine. If it doesn’t support either of those OSes, find something newer…

Key Firmware, Software, and Drivers to collect:
- CPU and Chipset Drivers
- Storage Controller Drivers
- NIC Drivers
- Out of Band Management OS Interface Drivers
- Latest/Last versions of System Firmware
- OOB, NIC, Storage Firmware
Be really detailed here and check for any add-in cards within the system, collect those Firmware/Drivers also. The steps here are similar to the work OEMs do for you with the base image of Azure Stack HCI you’d receive pre-installed. There is often a recipe or Firmware/Driver Bundle published for the specific system that supports Azure Stack HCI. You’re building that bundle here.
Once you’ve started collecting all that, create a folder on the system and dump the firmware and drivers/software in separate sub-folders. Unpack/Extract as much as you can so that you have *.inf and *.sys files for the drivers. It will help later.

Sample Folder Structure and Components

Sample Unpacked Drivers
Run through the drivers first, then the firmware to get the system up to date. Reboot and then run through Windows Updates to see if it finds newer/better versions of anything. Reboot again. Run update again… you know the drill.
Once you’re to a steady state, this system should be as good as it can be. You should validate that you can turn on and use 2 things before moving on. First, the system TPM NEEDS to be 2.0, it’s called out in the Requirements above. If it’s 1.2 check and see if the TPM can be swapped out.
Special Note: Some OEMs say that the TPM, which is a removable card, is now integrated into the mainboard and can’t be swapped. That isn’t strictly true. Some can be removed (sometimes easily, other times with pliers) and swapped with the 2.0 TPM option. *cough* HP Gen9 Servers *cough*
Verify the TPM can be enabled, in Windows Server Admin PowerShell run:
Get-TPM

If you see a bunch of “True” on the output. You’re good. If it’s false, the TPM isn’t correctly configured in the BIOS/UEFI.
Next verify the SecureBoot option is enabled and functional. In Windows Server Admin PowerShell run:
Get-SecureBootPolicy

You should see a GUID and version number if it’s properly enabled.
Check your BIOS/UEFI for both options. You might need to reset the system to factory defaults to properly clear old configs especially if you replace components, add new ones, or swap out the TPM.
Once you’ve got everything ship shape, it’s time to collect your work. Using the Windows Server 2022 USB Drive you created in the beginning, collect all the driver and firmware files from the system. Put it in a folder named something relevant to the system you’re working on. If there are multiple nodes, replay this work on all the other nodes to get them healthy and on the same firmware, and UEFI config to move on from here. Yes, install Windows, install the drivers and firmware.
The next thing to do is pull down Azure Stack HCI. At this point we need an Azure Subscription, you’ll have to have one later so, if you don’t have one. Go get one now. You can sign-up for Visual Studio Dev Essentials which comes with Free Azure Credits. Here: Visual Studio Dev Essentials – Visual Studio (microsoft.com)
Once you have your account. Go to: Home – Microsoft Azure and sign in.
Once on the landing page, in Search type: Azure Stack HCI

Select Azure Stack HCI to go to that landing page.

On that page go to “Step 2” and click to download the latest ISO.
Once you’ve pulled down the ISO, now we’re going to build a new Azure Stack HCI USB install key. This can be the same as the Windows Server USB Key we started with, but we need to get the Driver/Firmware folder off the drive FIRST!
One way to smooth out the install process and make the drivers self-loaded, is to Slipstream the Azure Stack HCI ISO with the driver packages you’ve collected. To do this, Thomas Maurer has a great guide to help add those drivers programmatically. Go here: Add Drivers to a Windows Server 2019 ISO Image – Thomas Maurer
Build out the directory structure he outlines and mount the HCI Image on your machine. You’ll substitute Windows Server 2019 with Azure Stack HCI 23H2, but still add the drivers to BOTH the Install.wim and Boot.wim before continuing. Once you have the drivers integrated, copy the contents of the ISO folder over to the USB Key. Then also copy over the Driver/Software/Firmware folder onto the USB Key. You shouldn’t need it, but if there is software or drivers that aren’t unpacked or don’t slipstream you can quickly add those to get things done. As an example, the HPE iLo CHIF driver doesn’t integrate well. Nor does the config tools for the storage controller and iLo.
The main reason to slipstream is to add hardware specific boot drivers that might be missing in the base image especially those required during install and device detection.
We’ll stop here as next step is the Planning and Identity Prep pieces. I want to take a minute and thank Thomas Maurer for the documentation links. His site is invaluable. Thanks for reading!


One thought on “Roll your own AVD on HCI deployment – Part 1: The Gear”